

How Do I Bump Test the BW Solo Single Gas Detector?
It’s important to bump test your gas detector before each day’s use, as recommended by the manufacturer. This helps to ensure that all sensors and alarms are functioning and responding to the presence of your chosen concentration of gas. For more information and guidance please read the manual, which can be downloaded from our product page.
Step 1 - What Do I Need to Calibrate the BW Solo?
To bump test the BW Solo single gas detector you will need appropriate calibration gas. In our video example, we’re using 50ppm ammonia in a balance of nitrogen as we are calibrating the NH3 (ammonia) version of the Solo. You’ll also need a single-stage regulator and the calibration cap and tubing, which should come with your Solo. Honeywell recommends using a 1lpm regulator for this particular monitor.
Always ensure you’re bump testing and calibrating the unit in an environment with fresh air.
Step 2 - Where Do I Access the Calibration Menu on the BW Solo?
The BW Solo has a one-button operation. To enter the menu, press the button twice in quick succession. Keep clicking the button until you see the option for BUMP. To access this function press and hold down the button for 3 seconds. The instrument will count down from 3 and will then perform a test on the audible, visible and vibrating alarms, one at a time.
If you find there's an issue with any of the alarms then you can choose to pass or fail the test at this point. To acknowledge and pass the results of the test press and hold the button again till you see ‘apply gas?’. Again, press the button to select this option.
Step 3 - How Do I Prepare the Calibration Equipment for the BW Solo?
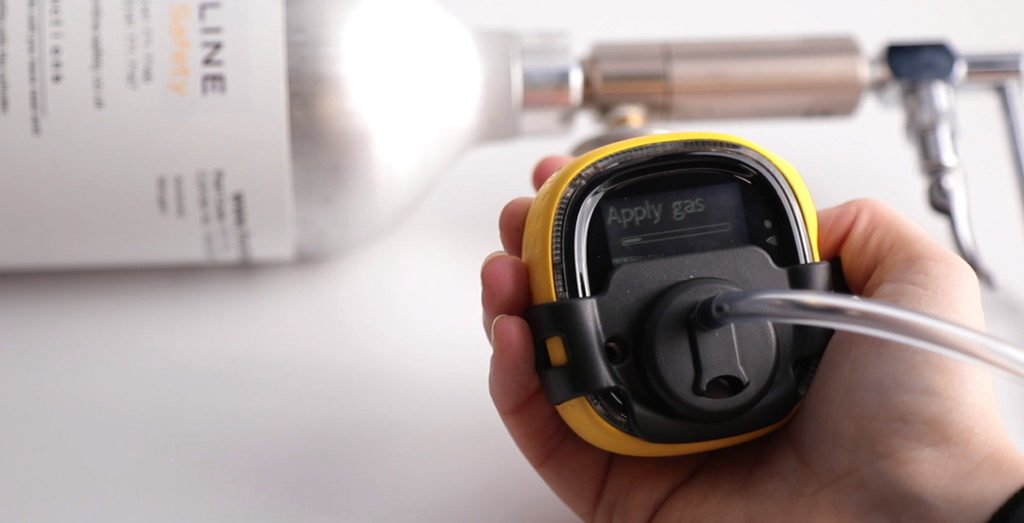
You should already have ensured the regulator is connected to the calibration gas bottle and the tubing is connected to the regulator. When 'apply gas' shows you can now attach the calibration cap provided over the front of the BW Solo, covering the gas sensor. Start with hooking the left clip of the cap onto the side of Solo and press down to snap the right hook in to place. You can now start applying gas by releasing the regulator valve. The progress bar will appear to show that the gas application is in progress.

Step 4 - How Do I Know If the BW Solo Has Passed Its Bump Test?
If the Solo passes the bump test, the message “Passed” will appear on the screen. If the Solo fails the bump test, the message “Failed” will appear. When the screen shows Turn Gas Off then the regulator can be closed off. Remove the calibration cap by pulling on the tab on the right and allow the Solo’s sensor to return to normal measurement mode.
Watch our video guide on our YouTube Channel to see the steps above in action. View our other videos on the BW Solo, including how to calibrate the gas detector.
-
 Selecting Appropriate Respiratory Protection for Your Workplace
-
 Breathing Safely: The MSA miniSCAPE's Critical Role in Lab and Pharma Environments
-
 Maximising Safety: The Top Benefits of Using a Confined Space Escape Set
-
 Breathing Safely: The Critical Role of Real-Time Dust Monitoring with the Trolex XD1+ in Preventing Occupational Lung Diseases
-
 Fall Protection in the Food and Drink Manufacturing and Processing Industry