

How To Assemble the Parts For the Drager X-Plore 8500 Powered Air Respirator
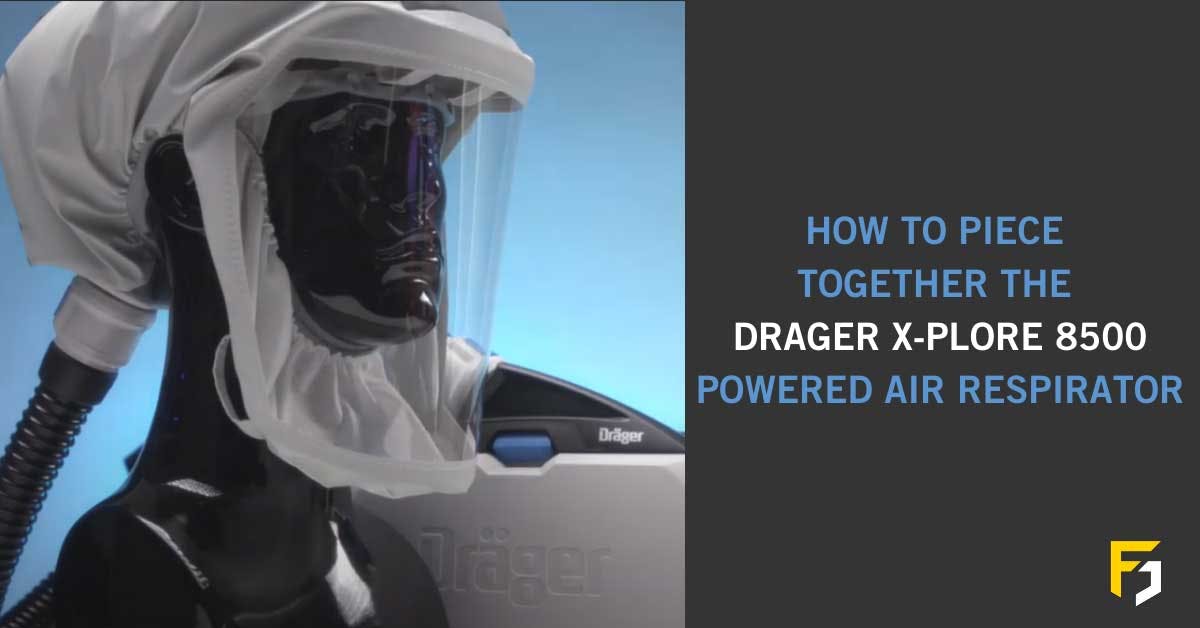
The Drager X-plore 8500 is a electronically powered air-purifying respirator that can be comfortably worn and carried. It's suitable for many applications including everyday use in warehouses, laboratories and healthcare, to more industrial, heavy-duty applications.
It comes with several modular parts and you can choose the which ones best suit you and your environment. This guide and YouTube video will demonstrate what's needed to complete a kit and how you piece it together. However, remember you can choose different filters, carrying belts and charging options to suit you.
Remember to always refer to the manufacturer's instruction manual before use.
What Drager X-plore 8500 Kit Is Shown In This Guide?
For the purposes of the guide and video this specific kit is made up of a short length hood in a size L/XL, the X-plore 8500 blower unit, a standard connecting hose, a high-capacity battery, PR SL filter and a decontamination belt carrying system. Additional accessories are available but are not mandatory. This complete kit is available on our website.

- Drager X-plore 8500 Blower Unit (R59500)
- Premium Hood Short (R59850)
- Long Life Battery (R59585) and Standard Charger (R59780)
- Filter PRSL (6739535)
- Standard Hose (R59620)
- Decon Belt (R59710)
Step 1 - Visual Checks
Before you construct and use the system always carry out a visual check of each component, ensuring there is not damage to any of the parts as this could compromise the usage.
Check the charging status by pressing the test button on the battery. This will indicate what the capacity currently is and will help ensure you have plenty of charge in the blower unit before entering a hazardous area. Next, check seal around the filter for any damage. The seal should be completely intact.

Step 2 - Insert the Filter
Unclick the grey splash guard on the front of the unit and place the filter on the inside of the guard, ensuring this is in the correct way. Then click both back onto the front of the X-plore blower unit.
Note: Combination filters should be clicked into the blower unit first and then the splashguard can be applied.

Step 3 - Attach the Blower Unit and Hose
You’re now ready to attach the blower unit onto the carrying system. The metal clips will secure onto the belt in accordance with the arrows. The battery is still easily accessible from underneath the bottom of the carrying strap.
Next attach the breathing hose. Both connections are the same, so to connect to the blower unit and hood push and turn the hose slightly until it clicks into place. You’ve now comprised a complete kit.
Note: different hoses are available for a helmet and a mask.
How Do I Disassemble the Drager X-plore 8500 PAPR Kit?
To disassemble the powered-air purifying respirator kit take great care in reversing the steps you took to assemble. Firstly, remove the hood and then switch the blower unit off by holding in the power button until it sounds and turns off.
Remove the hose by holding in the blue button and then twist and pull to un-attach from the hood. Repeat this step with the connection to the blower unit. You can now unclick the decon belt and place on a flat surface. You can press the blue button on the back of the belt to release the blower unit.
Remove the splashguard from the front the of blower and take out the filter. The filter should be disposed of properly.
The battery can be removed for charging and all elements of the Powered Air Unit should be cleaned thoroughly according to Drager’s instructions. Refer to the instruction manual for this.
You can view both of these processes on our YouTube Channel. Remember to always refer to the manufacturer's instruction manual before use.
-
 Investing in Safety: Cost or Savings? (World Day for Safety and Health at Work)
-
 Selecting Appropriate Respiratory Protection for Your Workplace
-
 Breathing Safely: The MSA miniSCAPE's Critical Role in Lab and Pharma Environments
-
 Maximising Safety: The Top Benefits of Using a Confined Space Escape Set
-
 Breathing Safely: The Critical Role of Real-Time Dust Monitoring with the Trolex XD1+ in Preventing Occupational Lung Diseases